
Screen Printing
Marking & decoration · Printing
Screen printing pushes ink through a patterned mesh onto a part.
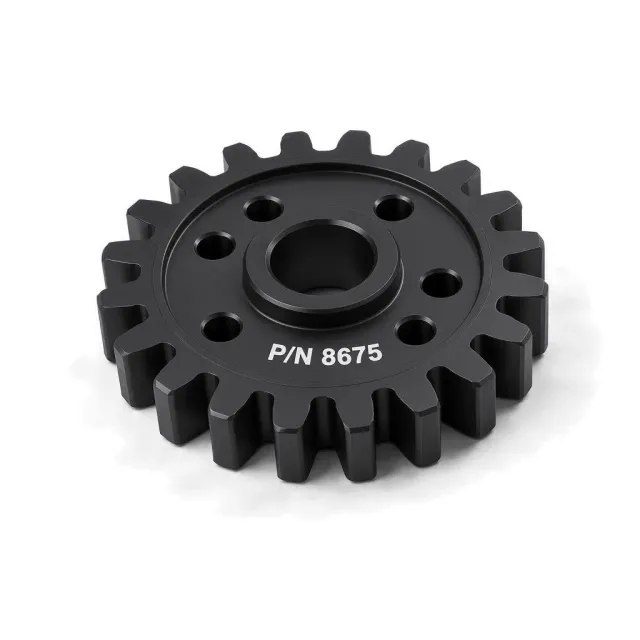
What is Screen print?
It is used for durable logos, legends, scales, and regulatory text on broad flat or cylindrical surfaces.
How it works
A stencil blocks selected openings in a tensioned mesh. A squeegee drives a controlled ink deposit through the open image area onto a cleaned substrate, after which the ink air-dries, heat-cures, or UV-cures. Each colour normally requires its own screen and registration pass. Ink chemistry and surface preparation determine adhesion; production approval commonly includes a cross-cut tape test and solvent-rub test on the actual substrate and finish.
Why specify it
- Deposits an opaque 10–25 µm ink film
- Economical for repeated medium-to-large graphics
- Supports spot colours and high-opacity white ink
- Can print a practical line width near 0.2 mm
Where it falls short
- Each colour adds a screen and registration operation
- Deep recesses and abrupt compound curvature prevent even squeegee contact
- Ink can wear through on frequently handled surfaces
- Adhesion varies with polymer grade and surface energy
Screen print at a glance
Screen print is strongest on cosmetic quality (75 of 100), at a budget cost. It adds little corrosion protection or lubricity. Surface hardness is not rated: the finish leaves the part's own surface.
Each score is 0–100 against every finish in this catalog. Corrosion comes from salt-spray life (ASTM B117, log scale) and hardness from the finish layer's Vickers or pencil hardness; cosmetic, lubricity and cost are FabDigit's engineering assessment. Economy on the radar is the inverse of cost.
Screen print key numbers
Typical values from the governing specifications and shop practice; bars are this finish against the highest value among marking & decoration finishes.
- Thickness
- 10–25 µm cured ink film; thickness describes deposited ink, not mark depth.
- Electrical
- Unchanged
- Colours
- black
- white
- spot colours
- custom colour
- Appearance
- Opaque flat graphics; gloss and texture depend on ink system and substrate.
Specifications for Screen print
The documents a drawing cites to define this finish, with the Type / Class rows that apply. Each links to a page explaining the standard.
| Standard | Type / Class | Thickness | Requirement / test | Status |
|---|---|---|---|---|
Paints and Varnishes — Cross-Cut Test · ISO · alternative | Classification 0 | — | Cut edges completely smooth; no lattice squares detached · Visual comparison after cross-cut procedure | Active |
| Classification 1 | — | Small flakes detached at intersections; affected area not significantly greater than 5% · Visual comparison after cross-cut procedure | ||
| Classification 2 | — | Flaking along edges or intersections affecting more than 5% but not significantly more than 15% · Visual comparison after cross-cut procedure | ||
| Classification 3 | — | Flaking in ribbons or parts of squares affecting more than 15% but not significantly more than 35% · Visual comparison after cross-cut procedure | ||
| Classification 4 | — | Large ribbons or squares detached, affecting more than 35% but not significantly more than 65% · Visual comparison after cross-cut procedure | ||
| Classification 5 | — | Flaking greater than classification 4 · Visual comparison after cross-cut procedure |
Test and related methods: ASTM D3359 (Standard Test Methods for Rating Adhesion by Tape Test).
Drawing call-out
SCREEN PRINT LOGO AND LEGENDS, WHITE, 0.20 MM MIN LINE WIDTH; ADHESION PER ASTM D3359, CLASS 4B MINPattern: CROSS-CUT ADHESION PER ISO 2409, MAXIMUM CLASSIFICATION <0–5>
Which materials take Screen print?
Verdict per material family, with the grades that behave differently. Each family links to its datasheets in the material library.
| Material family | Verdict | Notes |
|---|---|---|
| Yes | Common over anodize, paint, or conversion coating. | |
| Yes | Common for molded housings after resin-specific adhesion validation.
| |
| Yes | Common over paint, powder, or passivated stainless with a qualified ink. | |
| Yes | Usually printed over a cleaned coating or paint. | |
| With care | Needs a clean, often primed, surface and a metal-compatible ink. | |
| With care | Needs a clean, often primed, surface and a metal-compatible ink. | |
| With care | Requires glass-compatible ink and cure schedule. | |
| With care | Print over conversion coating or primer; bare magnesium rejects most inks. | |
| With care | Print over a clean painted or conversion-coated zinc surface. | |
| Limited | Print over a qualified coating rather than bare titanium. |
How Screen print is applied, and what it does to the part
- 1Clean and prepare surface
- 2Fixture part
- 3Align screen
- 4Print each colour
- 5Cure ink
- 6Inspect registration and adhesion
| Dimensions | Allow 10–25 µm local buildup where ink crosses a close-fitting interface. |
|---|---|
| Build-up per side | 10–25 µm — Ink builds above the local surface. |
| Masking | Usually needed. Keep ink off seals, electrical contacts, bonding areas, threads, and precision fits. |
| Electrical | Unchanged |
| Appearance | Opaque flat graphics; gloss and texture depend on ink system and substrate. |
| Added lead time | 3–7 working days on top of the bare part |
Design rules for Screen print
What to decide on the drawing before the part goes to the finisher.
- Use 0.20 mm minimum line width and gap.Finer openings are vulnerable to mesh bridging and ink gain.
- Keep the image on a flat or developable cylindrical area.The screen and squeegee must contact the image uniformly.
- Provide registration tolerance between colours.Each colour is printed in a separate pass.
- Specify ink colour and substrate finish.Opacity and adhesion depend on both.
- Reserve a fixture datum outside the artwork.Repeatable location requires mechanical registration.
Screen print versus the alternatives
Finishes engineers weigh against Screen print, and when each wins.
| Finish | Corrosion | Hardness | Cosmetic | Cost | Thickness | Choose it when |
|---|---|---|---|---|---|---|
Screen print this page | 0 | — | 75 | $ | 10–25 µm | — |
| 0 | — | 72 | $ | 5–10 µm | for small compound-curved surfaces | |
| 0 | — | 70 | $ | 0–50 µm | for variable permanent serial data |
The radar overlays Screen print with Pad Printing, its most common alternative — chosen for small compound-curved surfaces. Scores in the table are 0–100 across every finish in the catalog.
Cost, lead time and compliance
Relative cost
Screen Printing is a budget-cost finish ($): cheaper than about 85 % of the finishes FabDigit quotes.
Finishing is priced per part with a lot minimum, from FabDigit's own China-side rates. The exact figure appears on the instant quote once the part is uploaded.
Lead time and compliance
| Added lead time | 3–7 working days |
|---|---|
| RoHS | Compliant |
| Notes | Compliance depends on the selected ink and curing system; require supplier declaration for the specified colour. |
What Screen print is used for
- Control-panel legends
- Appliance graphics
- Container scales
- Regulatory labels
- Product logos
Screen print — frequently asked
What is the minimum line width for screen printing on parts?
Use about 0.20 mm as a practical starting minimum for a robust production image. Confirm finer text with the printer because mesh count, ink rheology, and substrate texture can increase line gain.
Is screen printing durable on plastic?
It can be durable when the ink matches the resin and the surface is prepared correctly. Qualify the actual part with ASTM D3359 or ISO 2409 adhesion plus a defined alcohol-rub test, because low-surface-energy polymers may need treatment.
Pad printing vs screen printing: which should I choose?
Screen printing is usually better for broad flat graphics and can deposit roughly 10–25 µm of opaque ink. Pad printing reaches smaller curved or recessed areas and commonly uses a thinner 5–10 µm film.
Can screen printing print multiple colours?
Yes, but each spot colour normally requires a separate screen and pass. Include registration tolerance and expect setup cost and cycle time to increase with every colour.
How do you test screen-print ink permanence?
Use a cross-cut tape adhesion test such as ASTM D3359 or ISO 2409, followed by a project-defined alcohol-rub and abrasion test. State the solvent, load, stroke length, and required cycle count because an unspecified rub test is not reproducible.
Other marking & decoration finishes
 Chemical EtchingChemical etching uses a patterned resist and material-specific etchant to recess graphics or create a frosted contrast.CorrosionHardnessCost$$$
 Dot Peen MarkingDot peen marking uses a controlled stylus to build characters and Data Matrix symbols from small permanent indentations.CorrosionHardnessCost$
 Electrochemical EtchingElectrochemical etching makes a localized permanent mark on an electrically conductive part through a stencil and electrolyte.CorrosionHardnessCost$$
 Embossing and DebossingEmbossing raises artwork above a surface, while debossing recesses it through forming dies or molded tool geometry.CorrosionHardnessCost$$$
 Hot StampingHot stamping uses a heated die to transfer pigmented or metallic foil onto a part.CorrosionHardnessCost$$
 In-Mold Decoration (IMD)In-mold decoration places a formed, printed decorative film in an injection mold so the graphic becomes part of the molded surface.CorrosionHardnessCost$$$$
 In-Mold Labeling (IML)In-mold labeling places a preprinted label in the mold before plastic is injected.CorrosionHardnessCost$$$
 Ink StampingInk stamping transfers a fixed image from a rubber, polymer, or metal stamp onto a part.CorrosionHardnessCost$